A Safer At-Home Car Wash Sequence
A cautious wash order that reduces avoidable paint contact and keeps manufacturer instructions in charge.
Learning how to wash a car without scratching it begins with a realistic goal. No wash method can promise a scratch-free result on every vehicle. Dust and road grit are abrasive, finishes vary, and damage may already be present. A careful sequence can, however, reduce avoidable contact, keep dirty tools away from cleaner panels, and create clear points at which to stop.
Start with the vehicle-care guidance and every product label. Those instructions take priority over a generic routine. Confirm that each cleaner is intended for the surface in question, note dilution and temperature limits, and do not mix chemicals unless the manufacturers explicitly direct it. If the finish is matte, wrapped, repainted, damaged, unusually hot, or otherwise outside familiar conditions, seek surface-specific guidance before continuing.
The principle: remove soil before adding friction
Most preventable wash marks are associated with moving contamination across the finish. That makes the order of operations important: inspect first, remove loose debris with water where appropriate, wash with clean materials and modest pressure, then dry without repeatedly dragging a saturated towel over the vehicle.
A safe car wash sequence is therefore less about a particular bucket or brand than about controlling four variables:
- Soil: How much loose grit, mud, organic material, or oily residue is present?
- Contact: When does a mitt or towel touch the paint, and how clean is it at that moment?
- Chemistry: Is the product suitable for the surface, used at the labelled dilution, and kept within its stated dwell conditions?
- Environment: Is the panel cool enough, is there shade, and can runoff be managed lawfully?
If any variable is uncertain, pause. More scrubbing is not a substitute for identifying the contamination or confirming compatibility.
Before water: prepare the work area
Choose a legal washing location with good drainage, adequate light, and a surface on which you can see dropped tools. Avoid working on panels that are hot to the touch or in conditions that cause products to dry before rinsing. Wind can carry grit onto a freshly cleaned panel and make spray difficult to control.
Gather the equipment before starting. The exact list depends on product instructions, but a cautious setup commonly includes:
- a water source and hose or other manufacturer-approved rinse method;
- dedicated wash media in clean condition;
- separate tools for wheels and the painted body;
- enough clean drying towels to replace any that become dirty or saturated;
- labelled wash products appropriate to the known surfaces;
- buckets or another system that lets you refresh or isolate contaminated solution;
- eye or hand protection when required by a product label.
Inspect wash mitts, brushes, sponges, towels, buckets, and hose ends. Embedded particles, hardened seams, exposed fasteners, or a dirty bucket can undermine an otherwise sensible process. Do not place wash media on the ground and return it to service without thoroughly cleaning and inspecting it. Remove rings, watches, belt hardware, or loose clothing features that could contact paint.
Check the vehicle as well. Look for open windows, loose trim, damaged seals, peeling paint, chips, exposed edges, aftermarket accessories, and electrical additions that may affect washing. Photographing notable existing damage can help distinguish pre-existing defects from later concerns.
Stage 1: assess and remove special hazards
Walk around the vehicle before rinsing. Heavy mud, sand, winter residue, tree sap, insect remains, bird contamination, tar-like spots, and unknown deposits are not interchangeable. Some may require a product-specific treatment rather than repeated pressure with normal wash media.
Do not scrape a dry deposit with a fingernail or improvised tool. Do not assume a strong household cleaner is safe for automotive paint, trim, glass, wheels, or protective films. If you cannot identify a substance or find a compatible treatment, the safer decision is to stop and obtain qualified advice.
Also note damaged areas. High-pressure water can worsen loose paint, failing film, weak decals, or compromised seals. Follow the pressure-equipment and vehicle manufacturers’ requirements for distance, nozzle, angle, and excluded areas. A generic article cannot establish a safe pressure setting for every machine or finish.
Stage 2: rinse loose contamination
Where local rules and vehicle instructions permit, rinse loose debris before touching the paint. Work methodically so displaced material leaves the panel rather than being chased across it. Give extra attention to dirt traps such as lower panels, wheel-arch edges, seams, and the rear of the vehicle, but avoid directing water into prohibited openings or damaged components.
The rinse is not proof that the surface is clean. Fine particles and bonded contamination may remain. Its purpose is to reduce the amount of loose soil present when contact begins. If substantial grit remains, repeat an appropriate non-contact step or reconsider whether an at-home contact wash is suitable.
Some owners use a pre-wash product. Treat this as optional and product-specific, not universally necessary. Confirm that it is compatible with the finish and existing protection, apply it only within labelled conditions, prevent it from drying, and rinse as directed. More dwell time or stronger concentration is not automatically better.
Stage 3: separate wheels and heavily soiled areas
Wheels, tires, wheel wells, exhaust surroundings, and lower-body sections can carry concentrated road soil and brake residue. Use dedicated tools so this contamination does not migrate to painted upper panels. Wheel finishes and braking components vary, so verify cleaner compatibility and application boundaries before use.
Never return a wheel brush, tire applicator, or wheel bucket solution to bodywork. Color coding or physically storing the tool sets apart can make this rule easier to follow.
Stage 4: contact wash in controlled sections
Prepare the wash solution exactly as its label specifies. Begin with a clean wash mitt or comparable approved media. Wash a small section using light, deliberate passes rather than aggressive circular scrubbing. Frequently rinse or replace the media so visible dirt is not carried forward.
Many owners work from cleaner upper panels toward dirtier lower areas. That is a useful default, but the actual soil pattern should guide the sequence. Reserve separate media for the lowest sections if practical. Door jambs, fuel-filler recesses, and other concealed areas may need their own tools and careful water control.
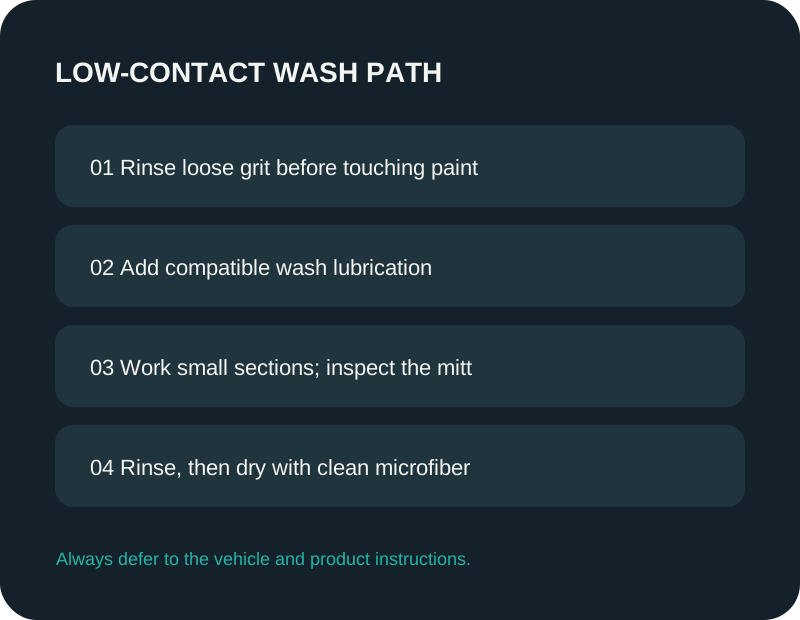
During the contact wash:
- Keep the panel wet enough to avoid product drying, within label directions.
- Use the least pressure that allows the wash media to glide.
- Inspect the media after visibly dirty areas.
- Rinse or exchange it before moving to the next section.
- Stop if the mitt catches, the contamination does not release, or the surface reacts unexpectedly.
A two-bucket arrangement is one way to separate wash solution from rinse water, but owning two buckets does not guarantee good technique. Dirty media can still return to the paint. Multiple clean mitts, a carefully managed bucket system, or another label-compliant method can all support the same objective: avoid reintroducing grit.
Stage 5: rinse deliberately
Rinse each section before cleaner dries. Check mirrors, trim edges, panel gaps, badges, and other areas where solution can remain. Residue emerging from a seam after the final rinse is a sign to address that area gently, not to rub harder across the adjacent panel.
Stage 6: dry with the same contact discipline
Drying is another contact stage, not an afterthought. Use clean towels that are suitable for the finish and free of debris, hardened residue, and damaged edges. Blotting or making controlled, low-pressure passes can reduce unnecessary movement. Replace a towel if it falls, picks up dirt, or becomes too saturated to work predictably.
After drying, inspect in diffuse light and from several angles. If dirt remains, do not grind it away with a dry towel. Re-wet and repeat an appropriate cleaning step, or stop if the residue requires diagnosis.
Keep runoff in mind
Outdoor washing can send detergent, oil, metals, and road residue toward drainage systems. Local requirements differ, and a storm drain may lead somewhere other than a treatment facility. The US Environmental Protection Agency provides Stormwater Smart outreach tools for communities addressing pollution carried by stormwater. That resource supports the need to consider runoff; it does not replace state, municipal, property, or product requirements.
Before washing, check local rules and the destination of the water. Where home washing is restricted or runoff cannot be contained appropriately, a compliant commercial facility may be the more responsible choice. Never improvise chemical disposal, discharge concentrated product, or assume that a product marketed as gentle may be released anywhere.
A go, modify, or stop decision framework
Use this quick framework before and during the wash:
Go when the surface is understood, equipment is clean, products are confirmed compatible, panels are cool, runoff is addressed, and you can complete small sections without drying.
Modify when conditions are manageable but need adjustment—for example, moving into shade, replacing dirty towels, separating lower-panel media, using less product according to the label, or postponing until wind drops.
Stop when contamination is unknown, paint or film is failing, a product begins to stain or dry unexpectedly, a tool contacts the ground, runoff would violate local rules, or the relevant instructions cannot be confirmed.
Stopping is part of a careful process. It prevents a minor cleaning problem from becoming a finish, safety, or environmental problem.
Pre-wash checklist
- Read vehicle, accessory, equipment, and chemical instructions.
- Confirm the wash location and runoff plan.
- Check that panels and wheels are within permitted temperature conditions.
- Identify special contamination and damaged surfaces.
- Inspect and separate body, wheel, and lower-panel tools.
- Prepare enough clean drying towels.
- Remove personal items that could contact paint.
- Plan a section order and a stop condition.
Frequently asked questions
Should I wash in straight lines instead of circles?
Direction alone cannot make dirty contact safe. Controlled passes can make any marks easier to interpret, but clean media, low pressure, soil removal, and frequent inspection matter more than a universal motion rule.
Is dish detergent suitable for car paint?
Do not assume so. Use a product whose manufacturer identifies the intended automotive surface and follow its directions. Household-product formulations and purposes vary, and a generic substitution is not a compatibility assessment.
Does a foam layer mean the car is clean?
No. Visible foam does not establish soil removal, lubrication, compatibility, or protection. Judge the process by the product directions, controlled removal of contamination, and careful inspection—not by foam thickness.
What if a mark remains after washing?
Stop dry rubbing. The mark may be bonded contamination, transfer, a stain, a scratch, or a change in the finish. Identify it before choosing a more aggressive process. Polishing or strong chemistry should not be the automatic next step.
Final principle
A safer wash is an evidence-led sequence: know the surface, reduce loose soil, control every contact, separate dirty tasks, follow product limits, manage runoff, and stop when the situation leaves that framework. The value is not a guarantee of perfect paint. It is a repeatable way to avoid turning ordinary maintenance into unnecessary abrasion or chemical risk.